Comp is a modular compositing tool that runs in the browser. You bring in an image or a video, or generate one, wire it through effect modules, drive their knobs with modulators, and watch the result update live. When it looks right, you render it out to a file.
It follows Dither Studio. Dither Studio taught me that a single pipeline with forty controls in a sidebar only goes so far. Comp drops the sidebar and puts every step on a canvas, where you can see it, reorder it and branch it.
No accounts, no backend. Your work is saved in your browser and the pictures never leave your machine: comp.pantoine.com.
A First Flow in Four Steps
An empty canvas full of wires can be intimidating, so first-time visitors get a short welcome tour. Each step comes with a clip recorded from the app itself.
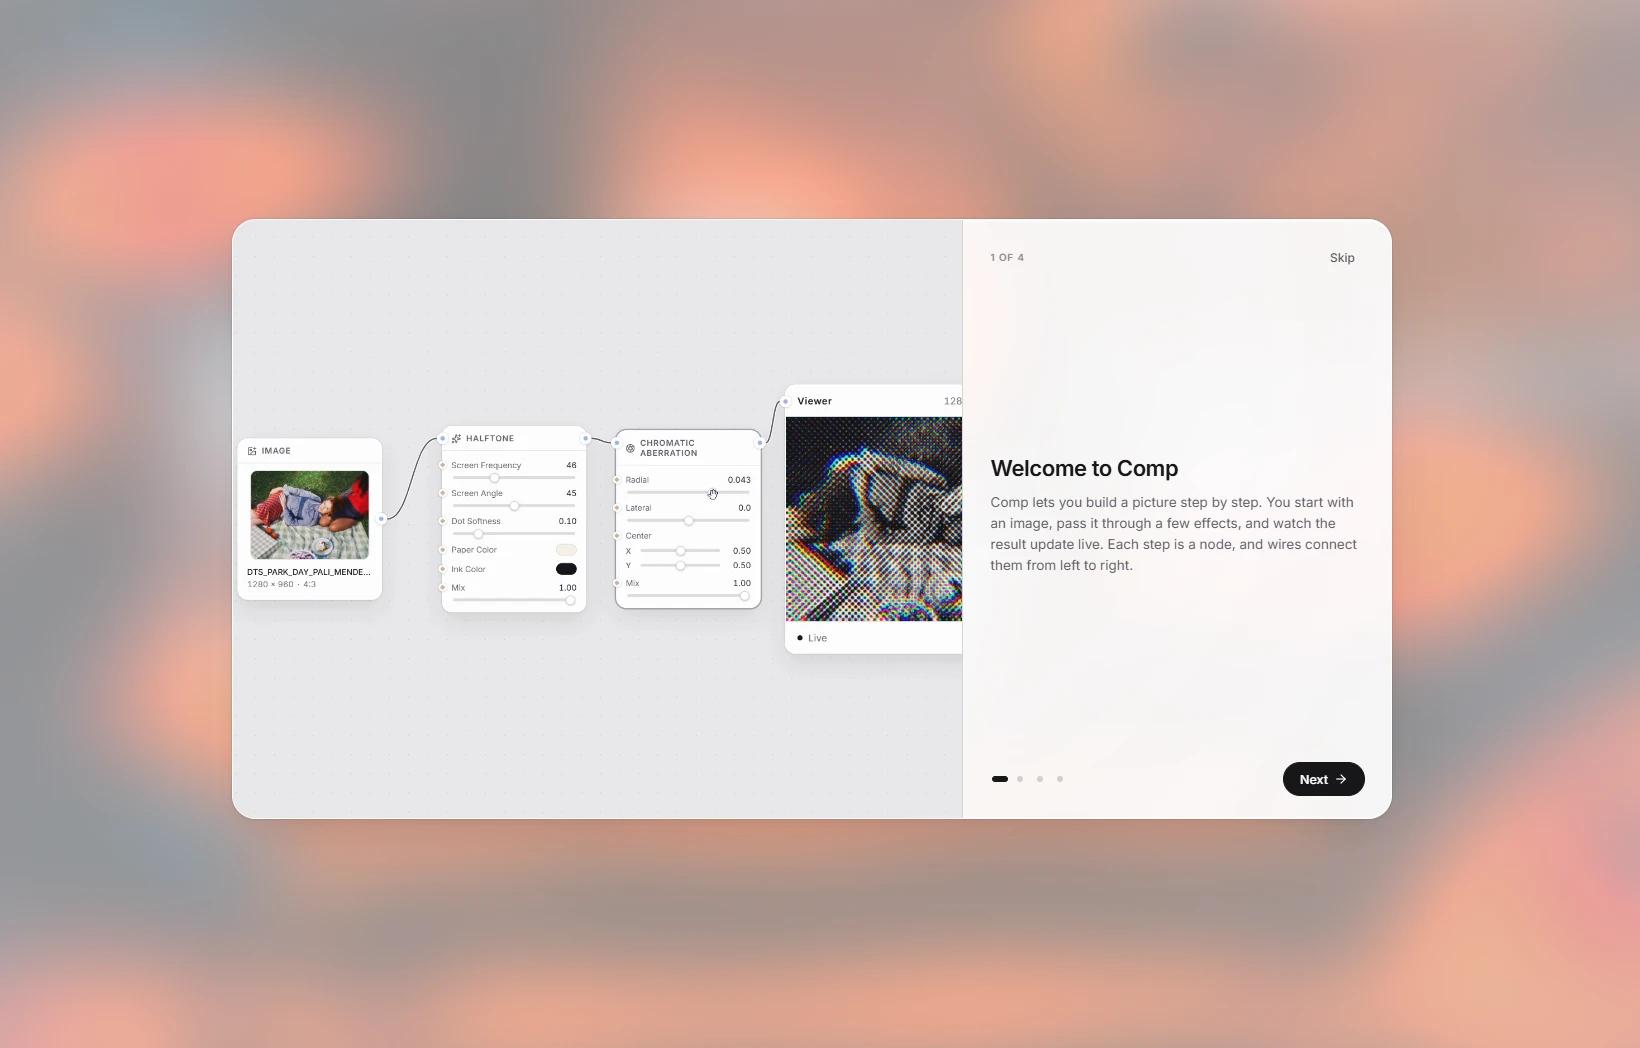
1. Every step is a module
You start with a picture, pass it through a few effects, and watch the result update live. Each step is a module, and wires connect them from left to right.
2. Bring in an image
Drop an image or a video straight onto the canvas, paste one from the clipboard, or pick Image from the Input menu.
3. Connect your first modules
Add an effect from the Module menu, or press Shift+A anywhere on the canvas. Then drag a wire from the image into the effect, and from the effect into a Viewer.
4. Export your work
Wire the chain into a Render module, choose a format and render. An Exporter then downloads the file.
How It Works
Everything on the canvas is a module, and wires run from left to right. There are four kinds:
- Inputs: an image, a video, or one of five generators: Ramp, Noise, Plasma, Cellular and Pattern.
- Effects: nearly eighty of them, sorted into nine groups:
- Color & Tone: the basic photo edits, like Exposure, White Balance, Curves and Selective Color.
- Optics & Blur: Bokeh, Tilt-Shift, God Rays and Lens Flare, among others.
- Transform & Warp: Kaleidoscope, Ripple and Corner Pin, among others.
- CRT & Display, Tape & Glitch and Temporal: effects that play out over time, like Feedback, Frame Hold and Datamosh.
- Modulators: LFO, Noise, Pulse, Value and a Step Sequencer produce a signal. Math, Map Range, Sample & Hold, Smooth and Envelope reshape it. Wire one into any knob and the knob moves on its own: a Pulse into an Envelope, for example, flashes on the beat.
- Outputs: a Viewer, a full-screen Background, and a Render module that bakes PNG, JPG, GIF, MP4 or WebM files for an Exporter to download.
Wires are colour coded, so you can tell how a flow is built from far away: blue for pictures, amber for modulation, purple for rendered files.
Design Decisions
The rule I kept coming back to was small modules, chained. A retro CRT look isn’t one module with forty sliders. It’s Scanlines, then Shadow Mask, then Lens, and you can swap their order to see what changes. It makes the menu longer, so each category is sorted alphabetically, but each card stays short enough to read at a glance.
The cards themselves are generated from each effect’s definition. Every module gets the same layout, the same sliders you can type into, drag or reset, and the same port beside each knob. Adding an effect to the app takes one file and one line, and its controls follow automatically.
I spent a lot of time on the feel of the canvas: alignment snapping, undo, deleting a module and having the chain close the gap behind it, dropping a module on a wire to splice it in. Press Shift+A while dragging a wire and the add menu opens with the wire still attached, ready to plug into whatever you pick. Sliders keep their thin look but accept a press across a much wider band, so a near miss no longer drags the whole card. And a quiet caption at the bottom of the canvas suggests the few shortcuts that apply to what you’re holding. None of it shows in a screenshot. You notice it when it’s missing.
The interface is a set of frosted glass panels, with three typefaces: Bricolage Grotesque for titles, Instrument Sans for the interface and DM Mono for numbers. It follows your system into dark mode, or you can pin a theme. The only colours that don’t change between themes are the ports, since they carry meaning.
Pictures as Parameters
This is my favourite part, and it is borrowed from Blender.
A knob with a diamond-shaped port also accepts a picture. The knob then has a different value at every pixel. Wire a radial gradient through a Map Range into a Blur’s radius, and you get a picture that is sharp in the centre and soft at the edges, with no mask module in sight.
The wire turns dashed to show it carries a picture, and the knob greys out and locks, since a picture now drives it. Types convert the way Blender converts them: a colour knob takes the RGB, a number takes the luminance, a toggle switches on where the picture is bright.
It works the other way too. Image Statistic reads a picture’s mean, min or max back out as a signal, and now keeps a short history of its readings. Feed it into Smooth and a knob can follow the brightness of a video without jittering on every frame.
Groups, Presets and the Background
Once a chain works, you can collapse it into one card, choose which of its knobs show on the front, and drop the whole group on a wire like a single module. Save it as a preset and it comes back as a group in any other flow. Two presets are built in: Toon, a cel-shaded look with ink outlines, and Slit-Scan, which spreads time across the picture.
A Viewer can float over the screen while you work. The Background output goes further and puts the result behind the whole canvas.
Under the Hood
Built with React 19, TypeScript and Vite. The canvas is React Flow, the state lives in Zustand, and every effect is a WebGL2 fragment shader. Effects chain through framebuffers at the source’s own resolution, and the renderer walks back from each output, so a branch that reaches no output costs nothing. It only redraws continuously when something actually moves. Exports use gifenc for GIFs and mediabunny for video.
Pictures and videos stay outside the app’s state on purpose. The state is small enough to save on every change and to undo, and dragging a slider never pushes pixels through React. Modulators that look back in time, like Smooth or Sample & Hold, are still pure functions of time, so a render replays them exactly as the preview did. The build also compiles every shader before shipping, so a broken effect fails there, not in front of a visitor.
Like my other recent projects, it was built in AI-assisted sessions, over about seventy commits in two weeks. The agents wrote most of the shader maths and boilerplate, while I spent my time on the interaction design and on tuning each effect until it looked right.